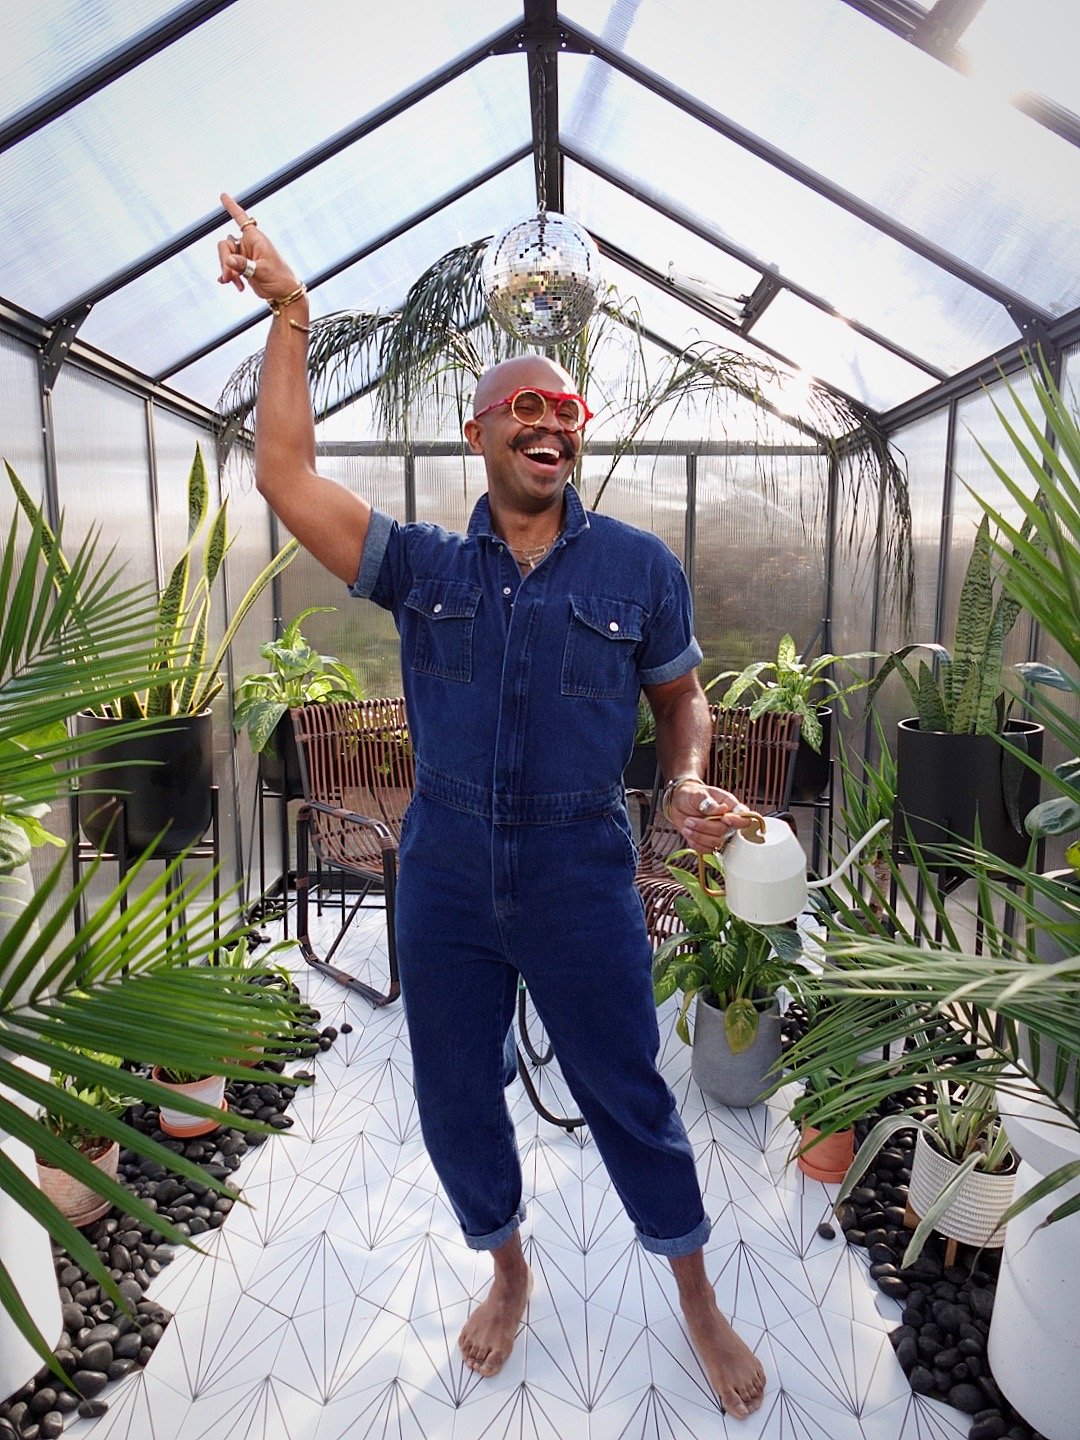
Greenhouse IV: My New Happy Place
Y’all, for as long as I can remember, I’ve always been fascinated with greenhouses! From becoming completely enamored with them while watching some of my favorite childhood movies based in the English or Spanish countryside, to a more recent experience at Michler’s Greenhouse while visiting Lexington, KY, simply being inside of a greenhouse feels as if I’ve been transported to another greener and more lush world! And since travel is a big inspiration of mine for design, I decided that I wanted one for myself!
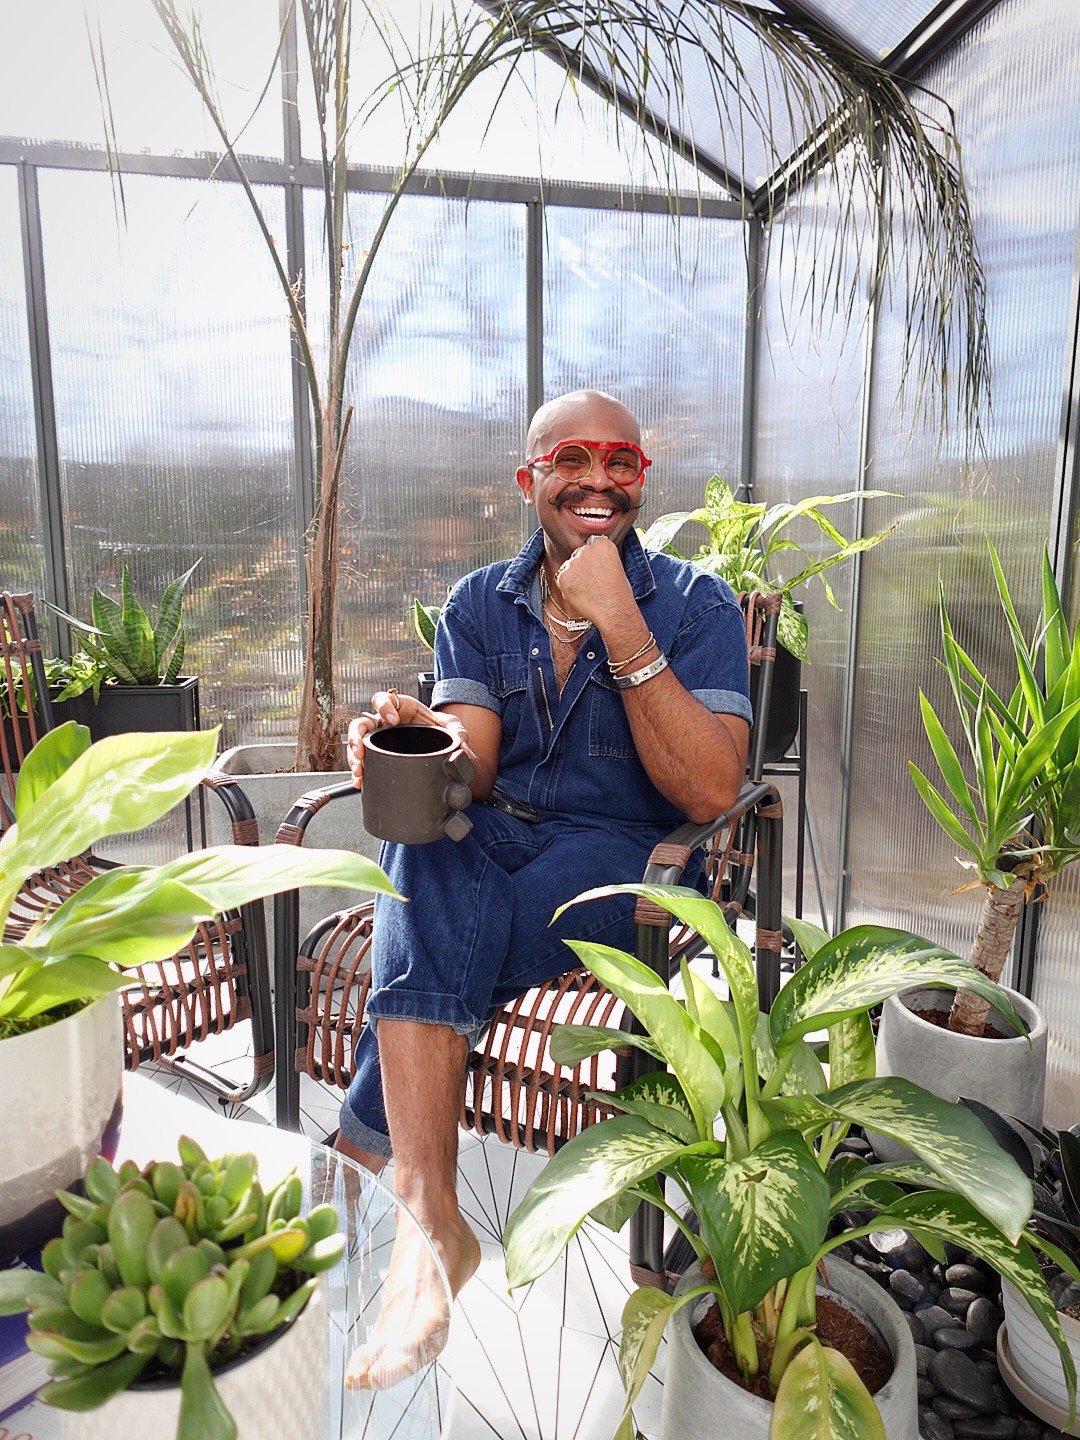
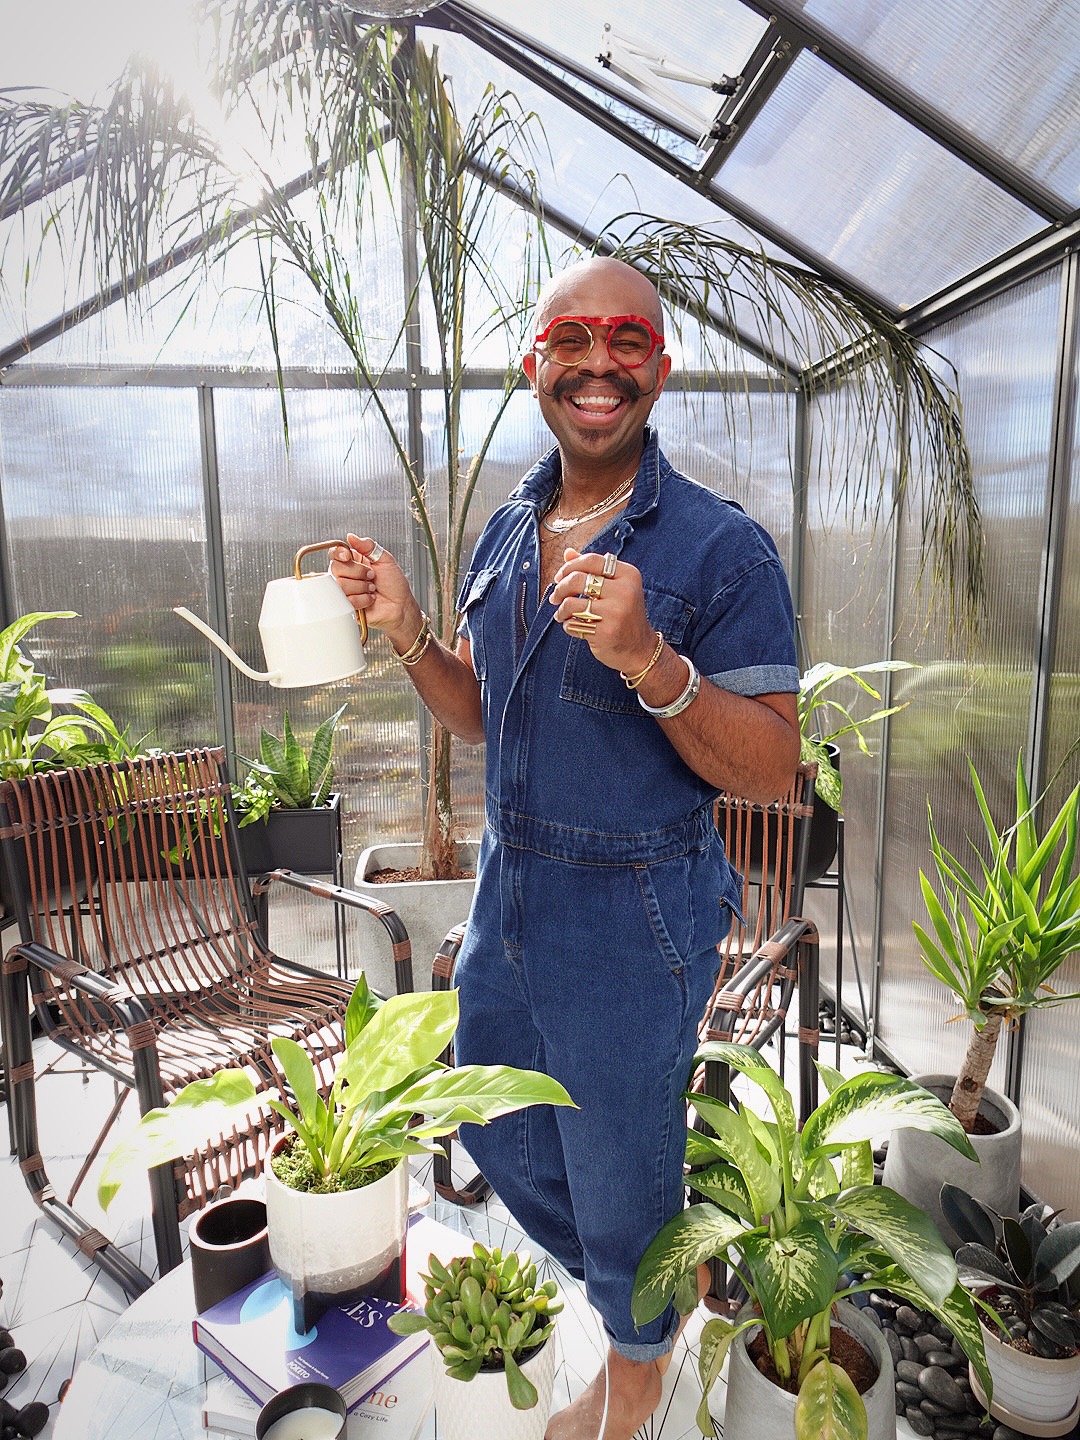
There’s no secret that plants and I have a serious thing going on! I absolutely love the calm they give me, and the connection I have with them because of my mom and heritage makes taking care of plants more than a hobby, it’s now part of me! So, Greenhouse IV - the name of my greenhouse, like every other project on my property ending in “IV” - is not only a home for my plant bbs, it’s my happy place!
Earlier this fall, I started planning the build-out of my greenhouse. And since I’m now in a long-term partnership with Lowe’s, I was thankfully able to build and furnish Greenhouse IV with their help! Despite the partnership, there were still some out-of-pocket expenses, and just in case you’re looking to plan a greenhouse build of your own, I’m here to break down those costs (and savings) for you!
Ok, and to share a few beautiful and fun photos in the process!
The Foundation

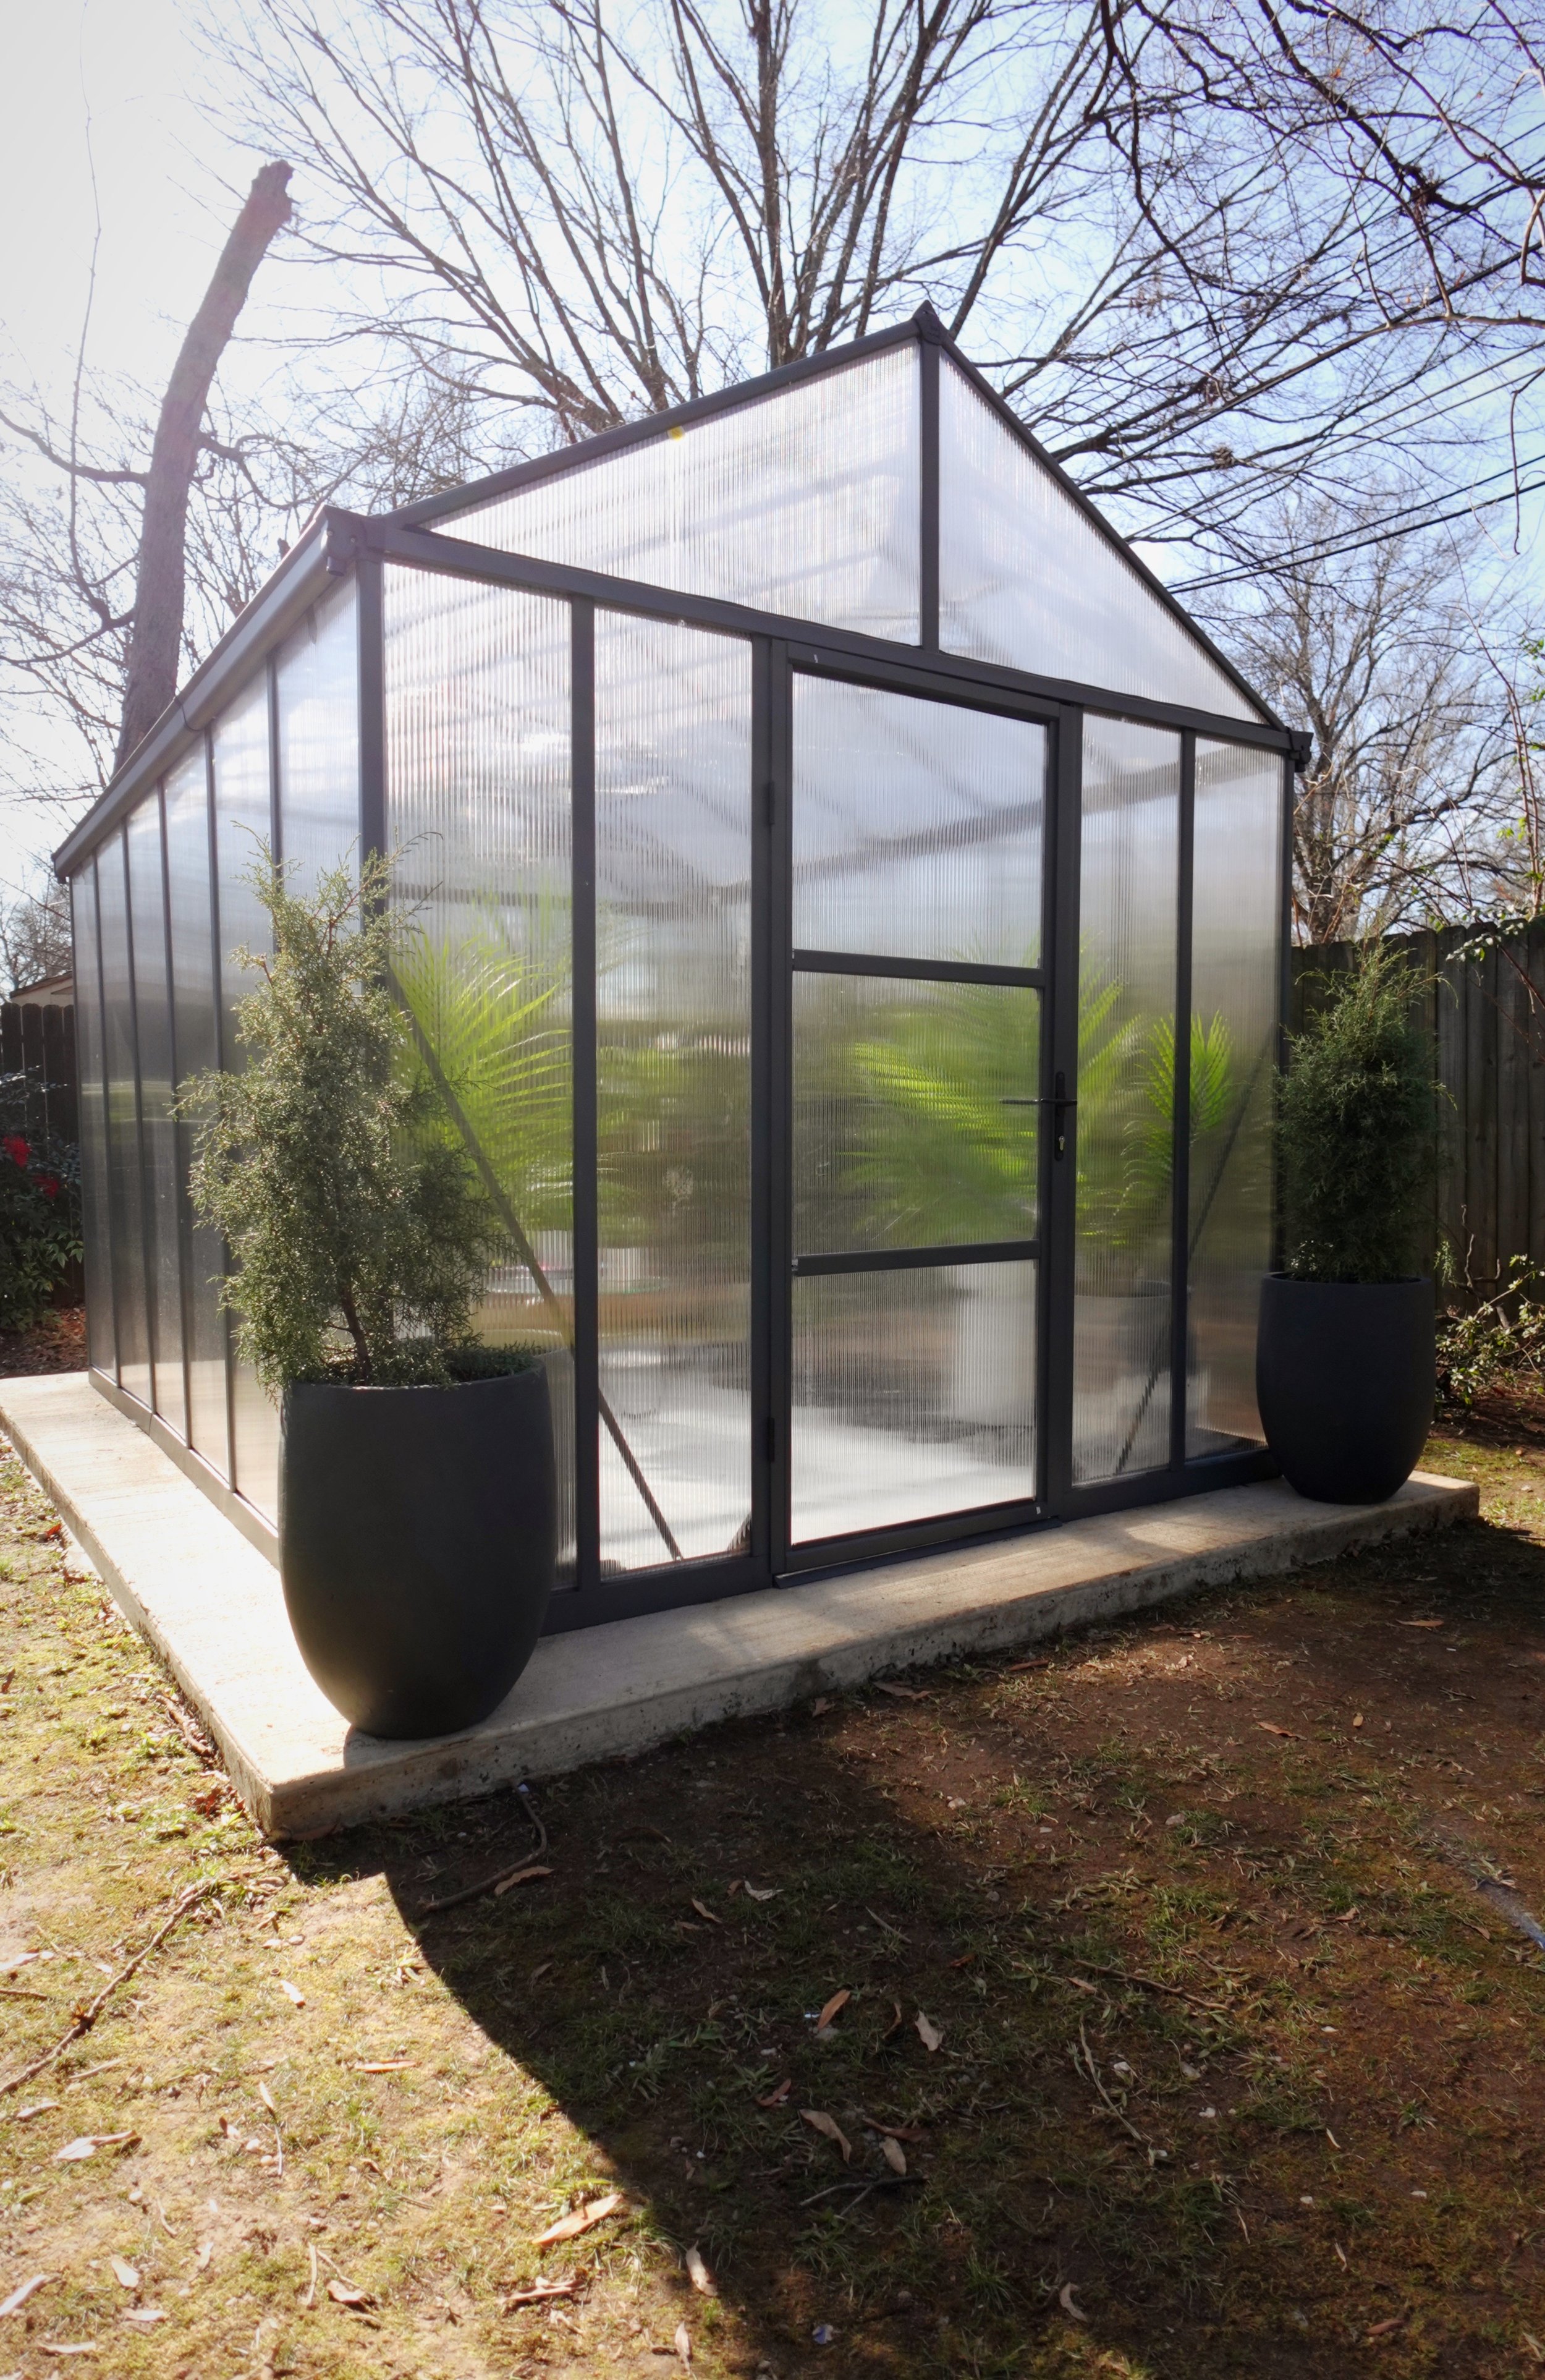
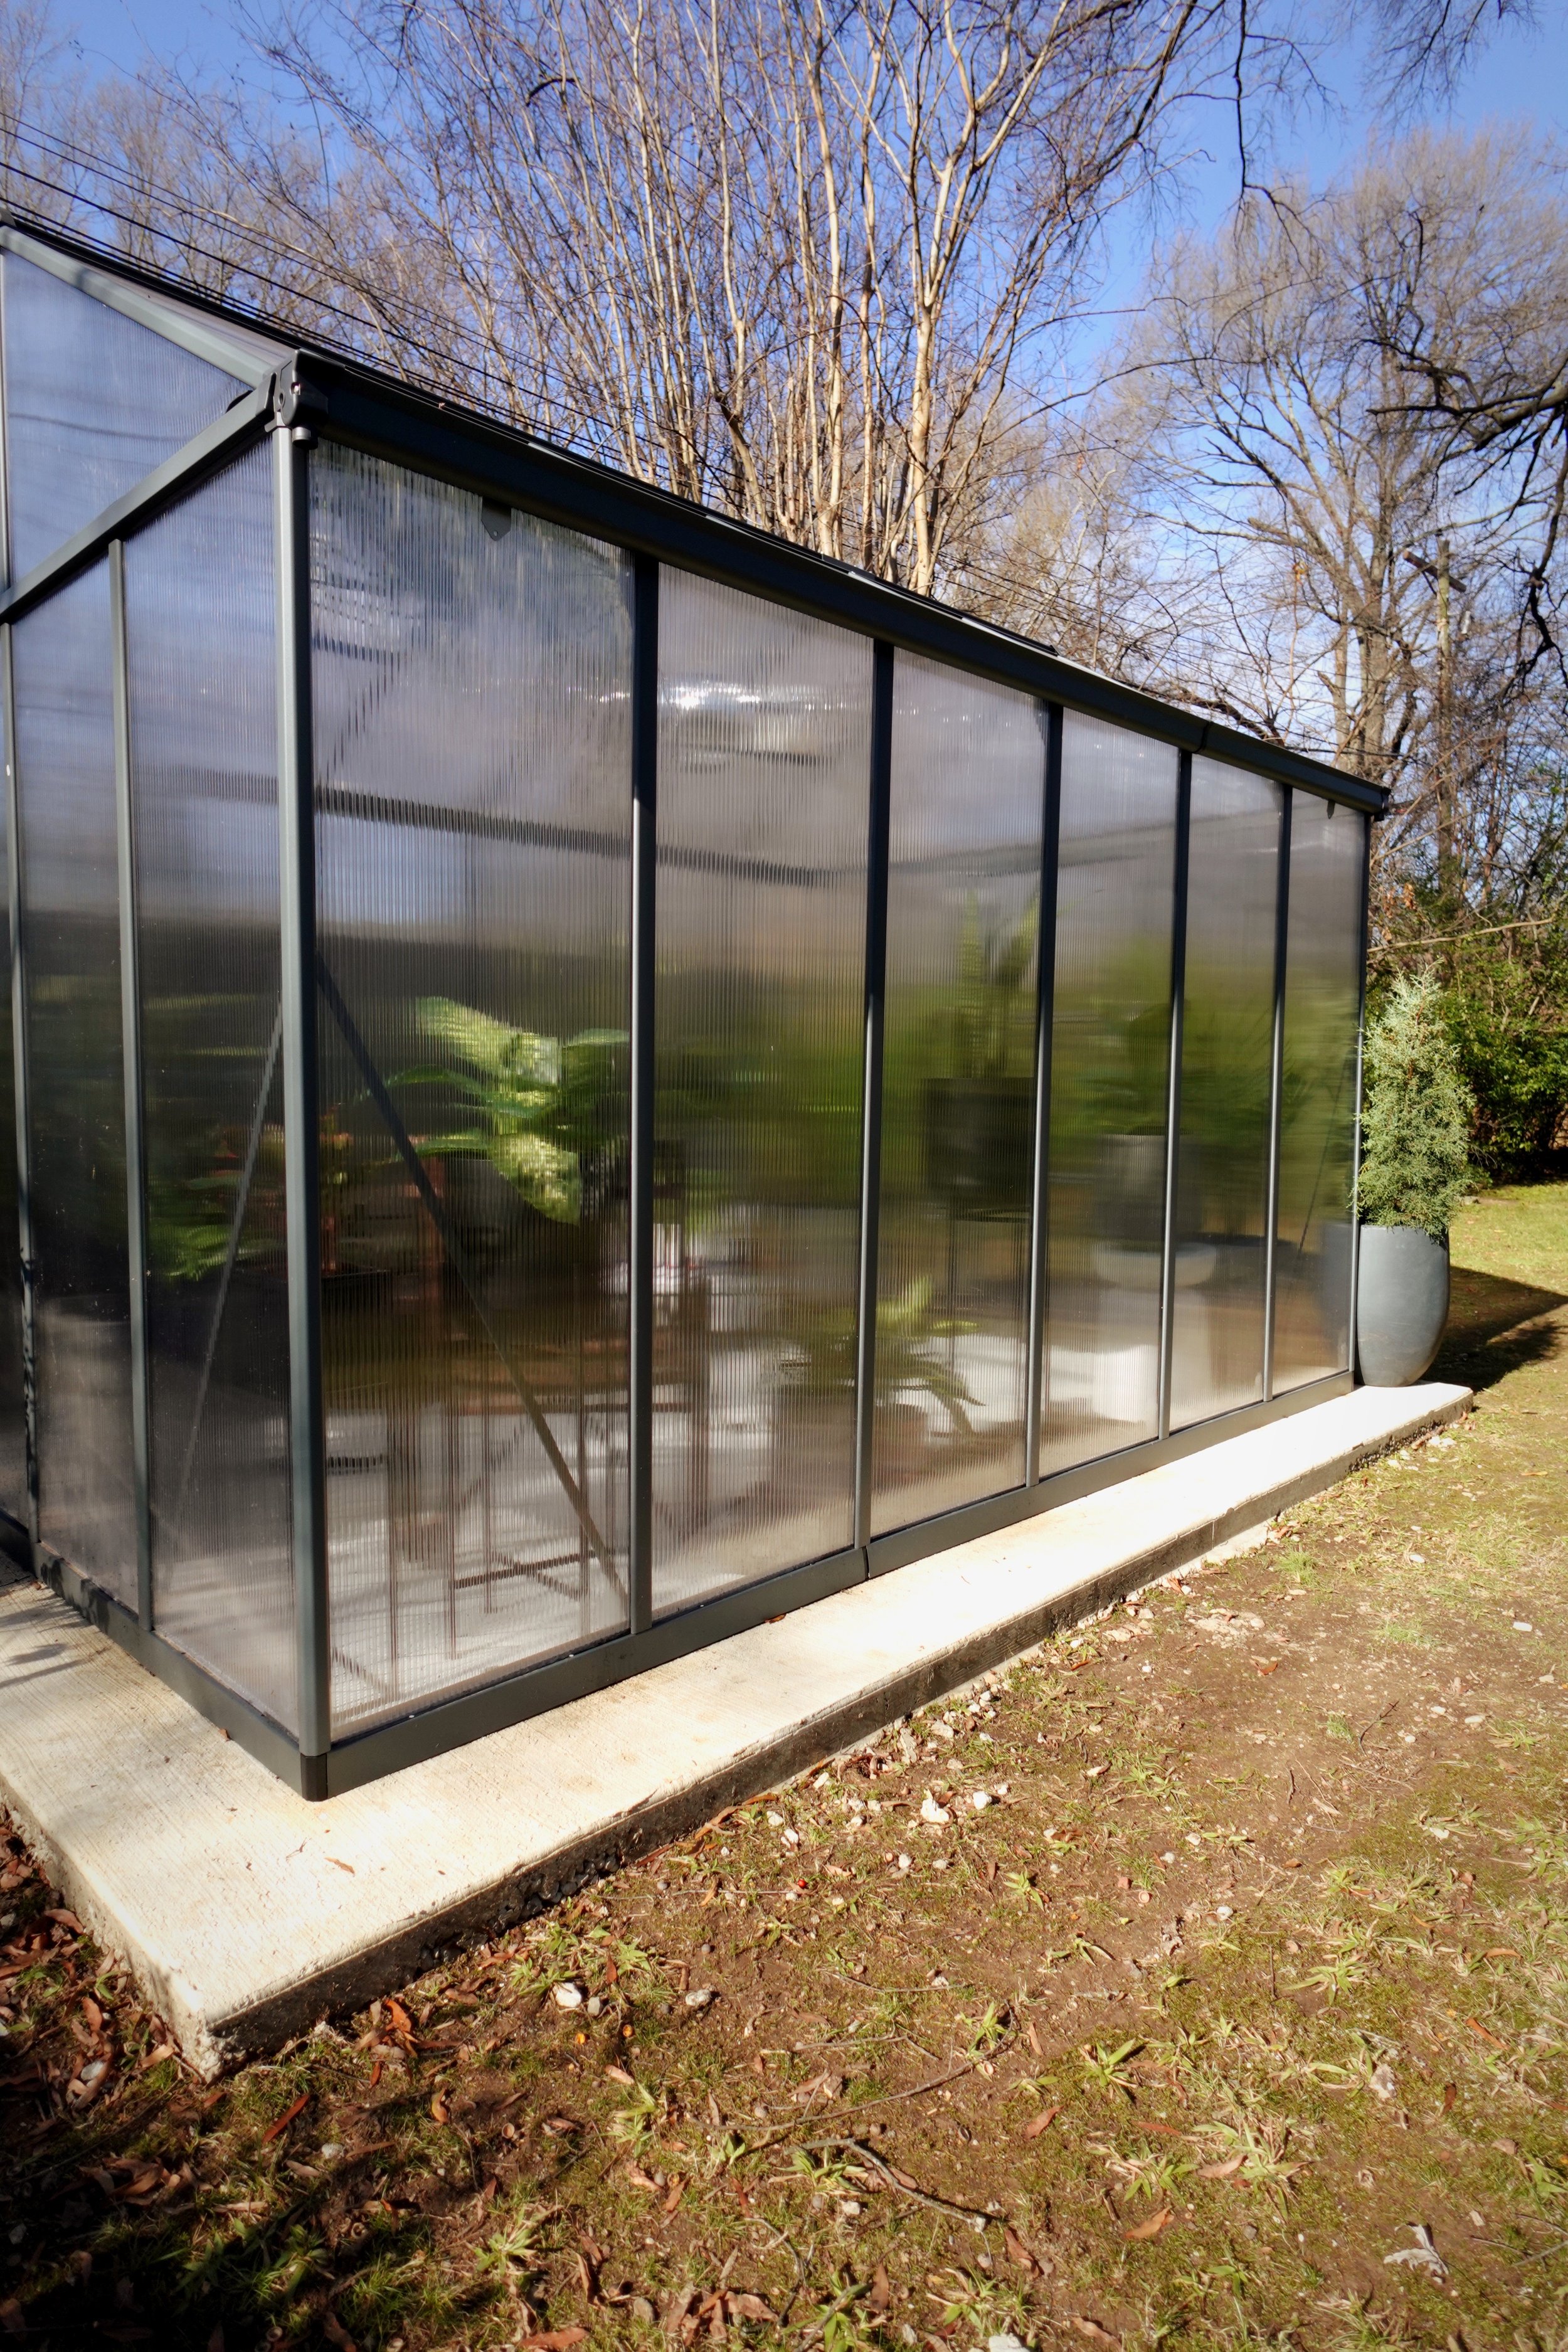
In order for me to determine if this project could even work, I assessed my backyard to see if I had enough space - especially since I’m planning a springtime project involving . . . water and a diving board! After seeing that I had ample space, I selected the size of my greenhouse, and from there determined the size of the slab. Since I went with a 12’x8’x9’ (LWH) building, I decided to get a 6” thick, 10’x14’ concrete slab poured. This way, I would be able to secure the structure to the concrete foundation with bolts without worrying about the edges being compromised or cracking due to impact. Too, this left me a 12” ledge to place planters on the outside!
Locally, I purchased the concrete from Safety Quip, who specializes in large and small concrete jobs, and here’s the cost breakdown:
2 yards of concrete: $354
Delivery: $210 (they hold the truck for an hour)
Total with (TN) taxes: $618.99
To fabricate the form and pour the concrete, I hired a gentleman who I knew did some concrete work for my parents, and does an AMAZING job! His labor was $850, which included trimming and removing any bushes that would obstruct the slab from being poured, as well as hauling the concrete from the truck to the built form, and cleanup.
The grand total for the concrete and labor comes to, $1,468.99
Our Greenhouse

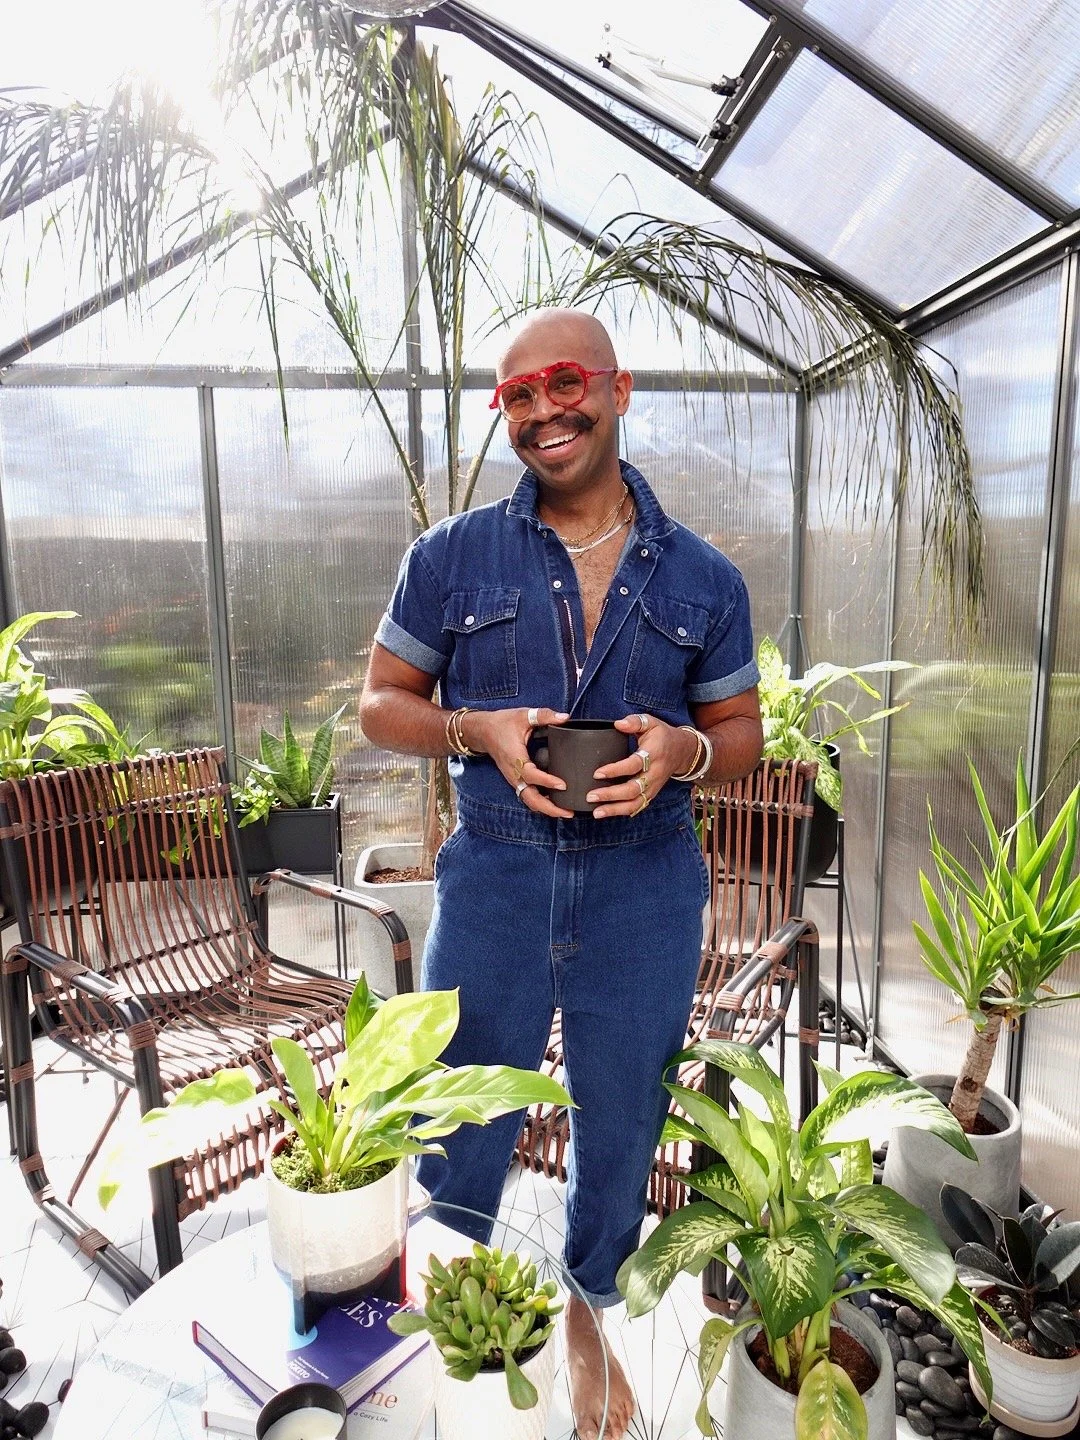
Because I didn’t want to take up too much space in my backyard - remember, I’m trying to build a pool later on - I wanted to find a greenhouse that was spacious enough to fit my larger outdoor plants for the winter months, while allowing enough space for me to relax, nap and care for any other plant I decided to welcome into the fold.
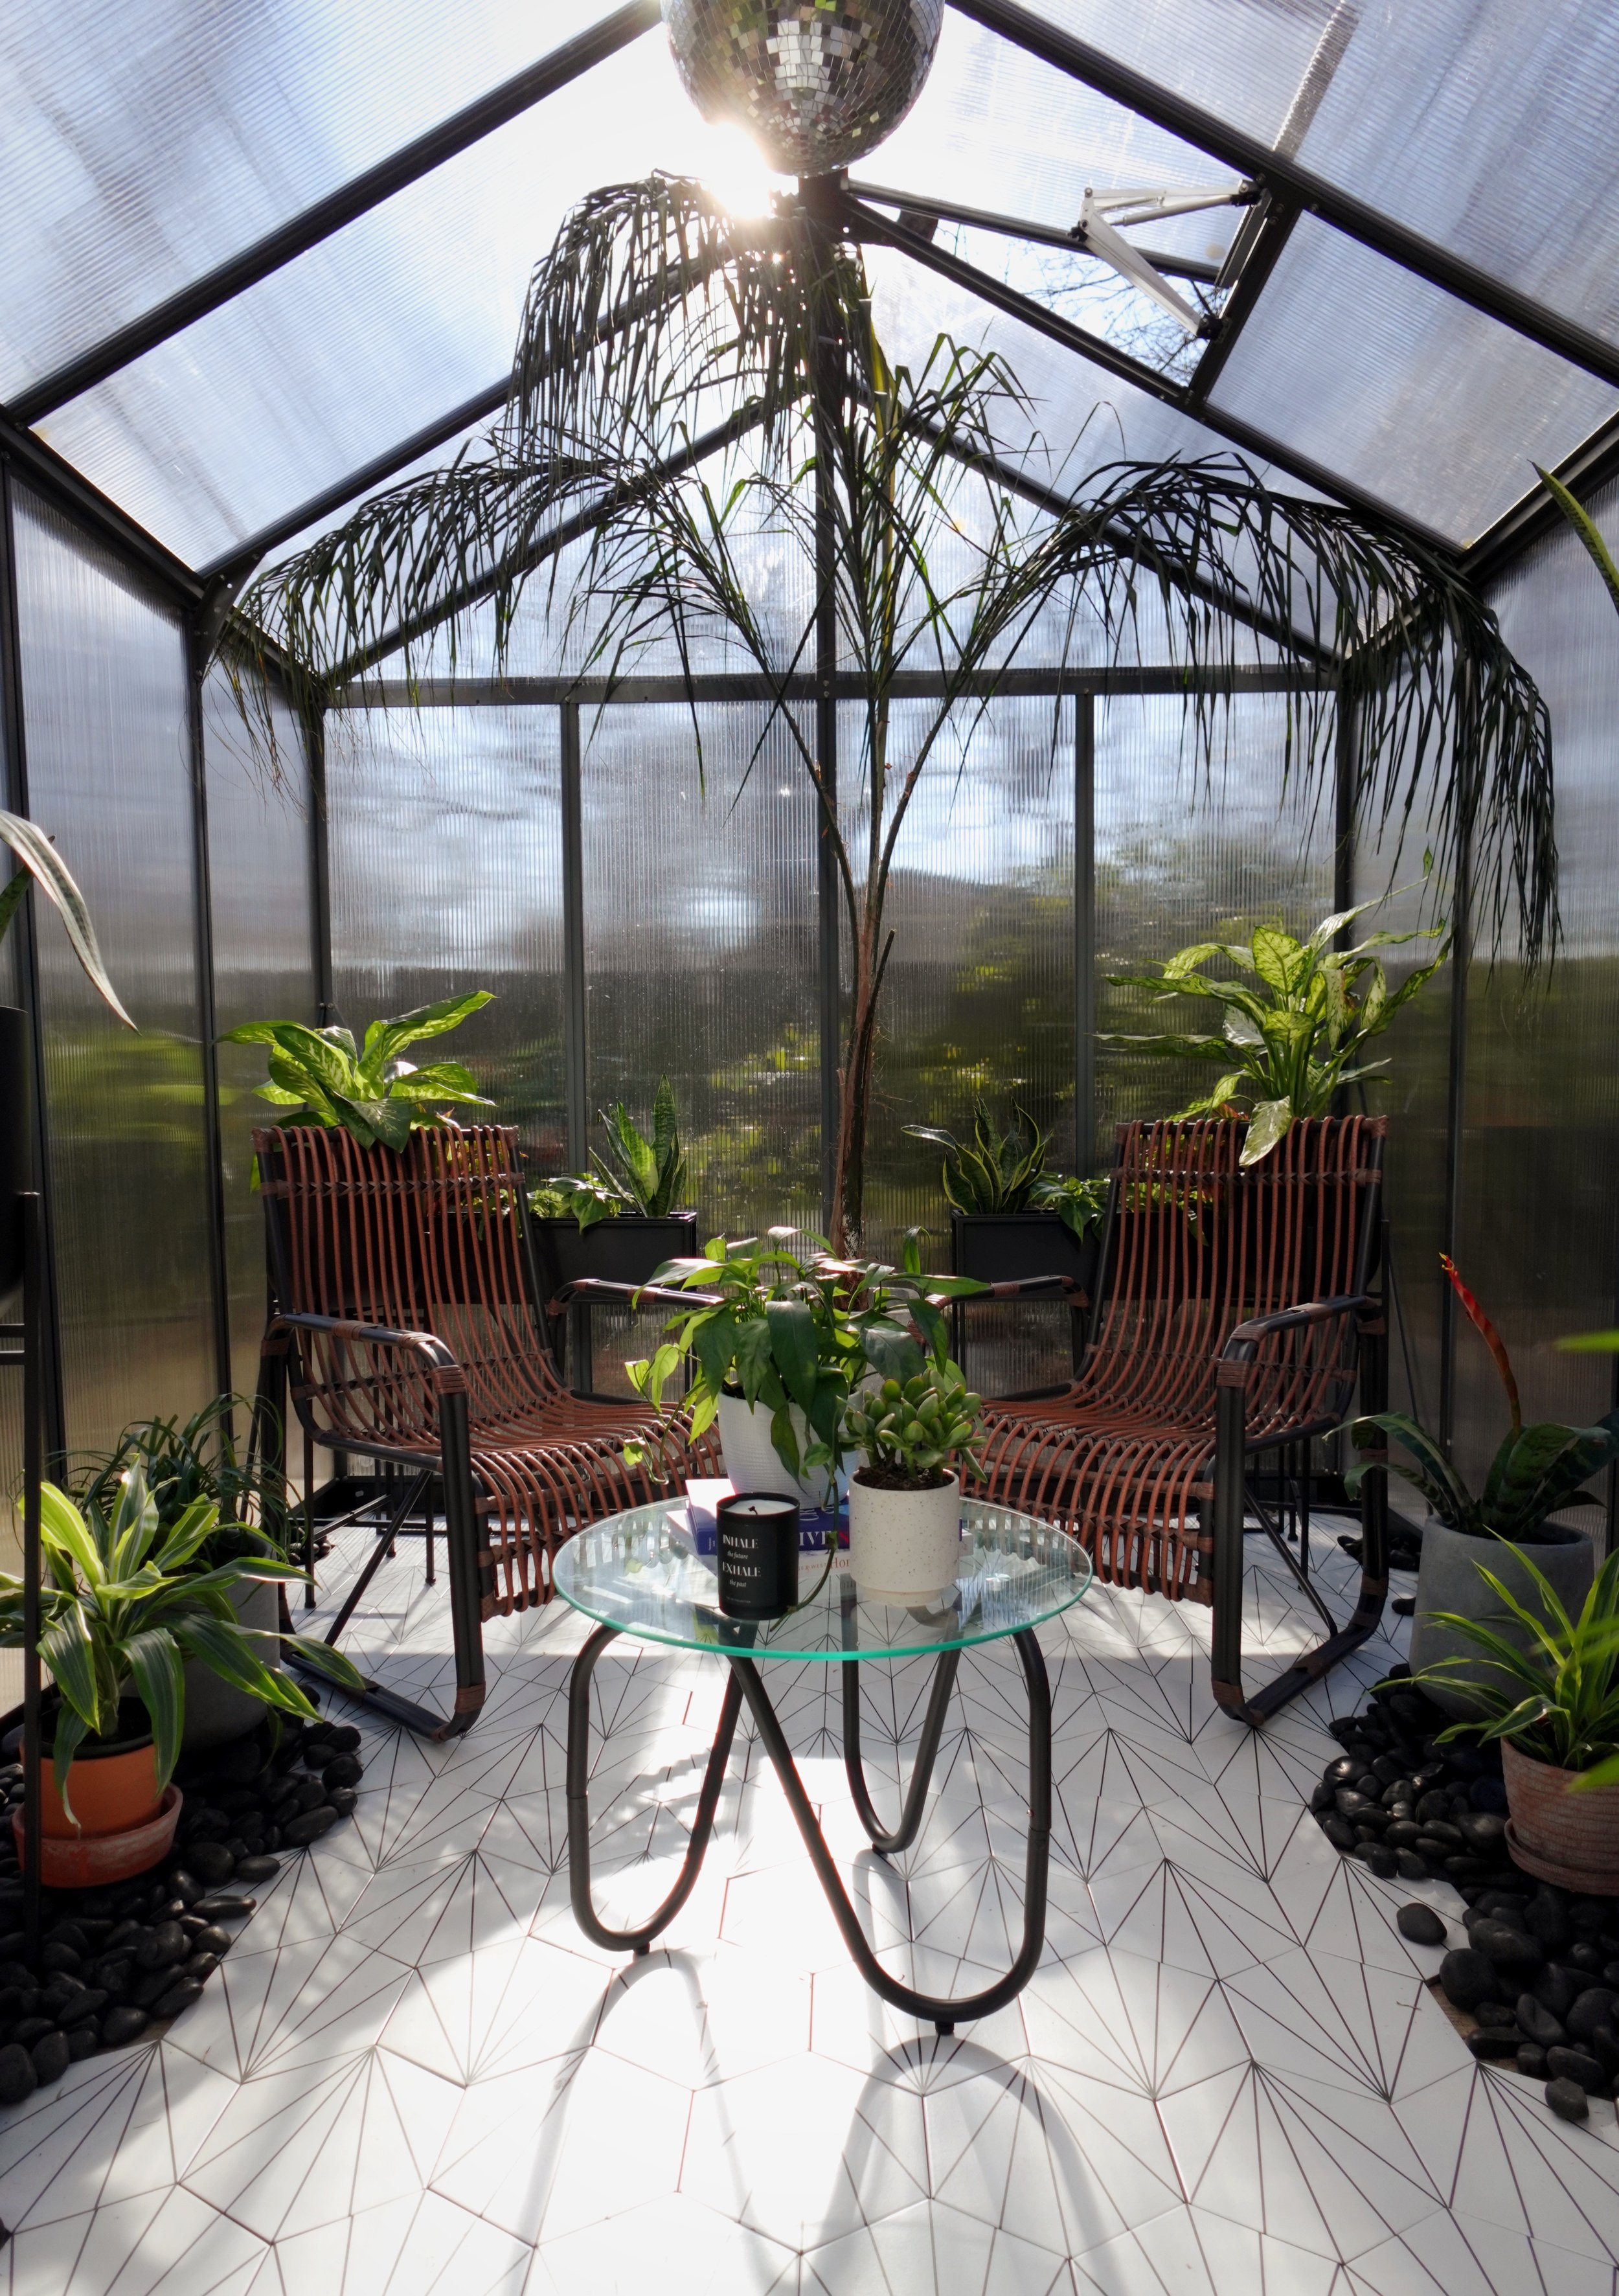
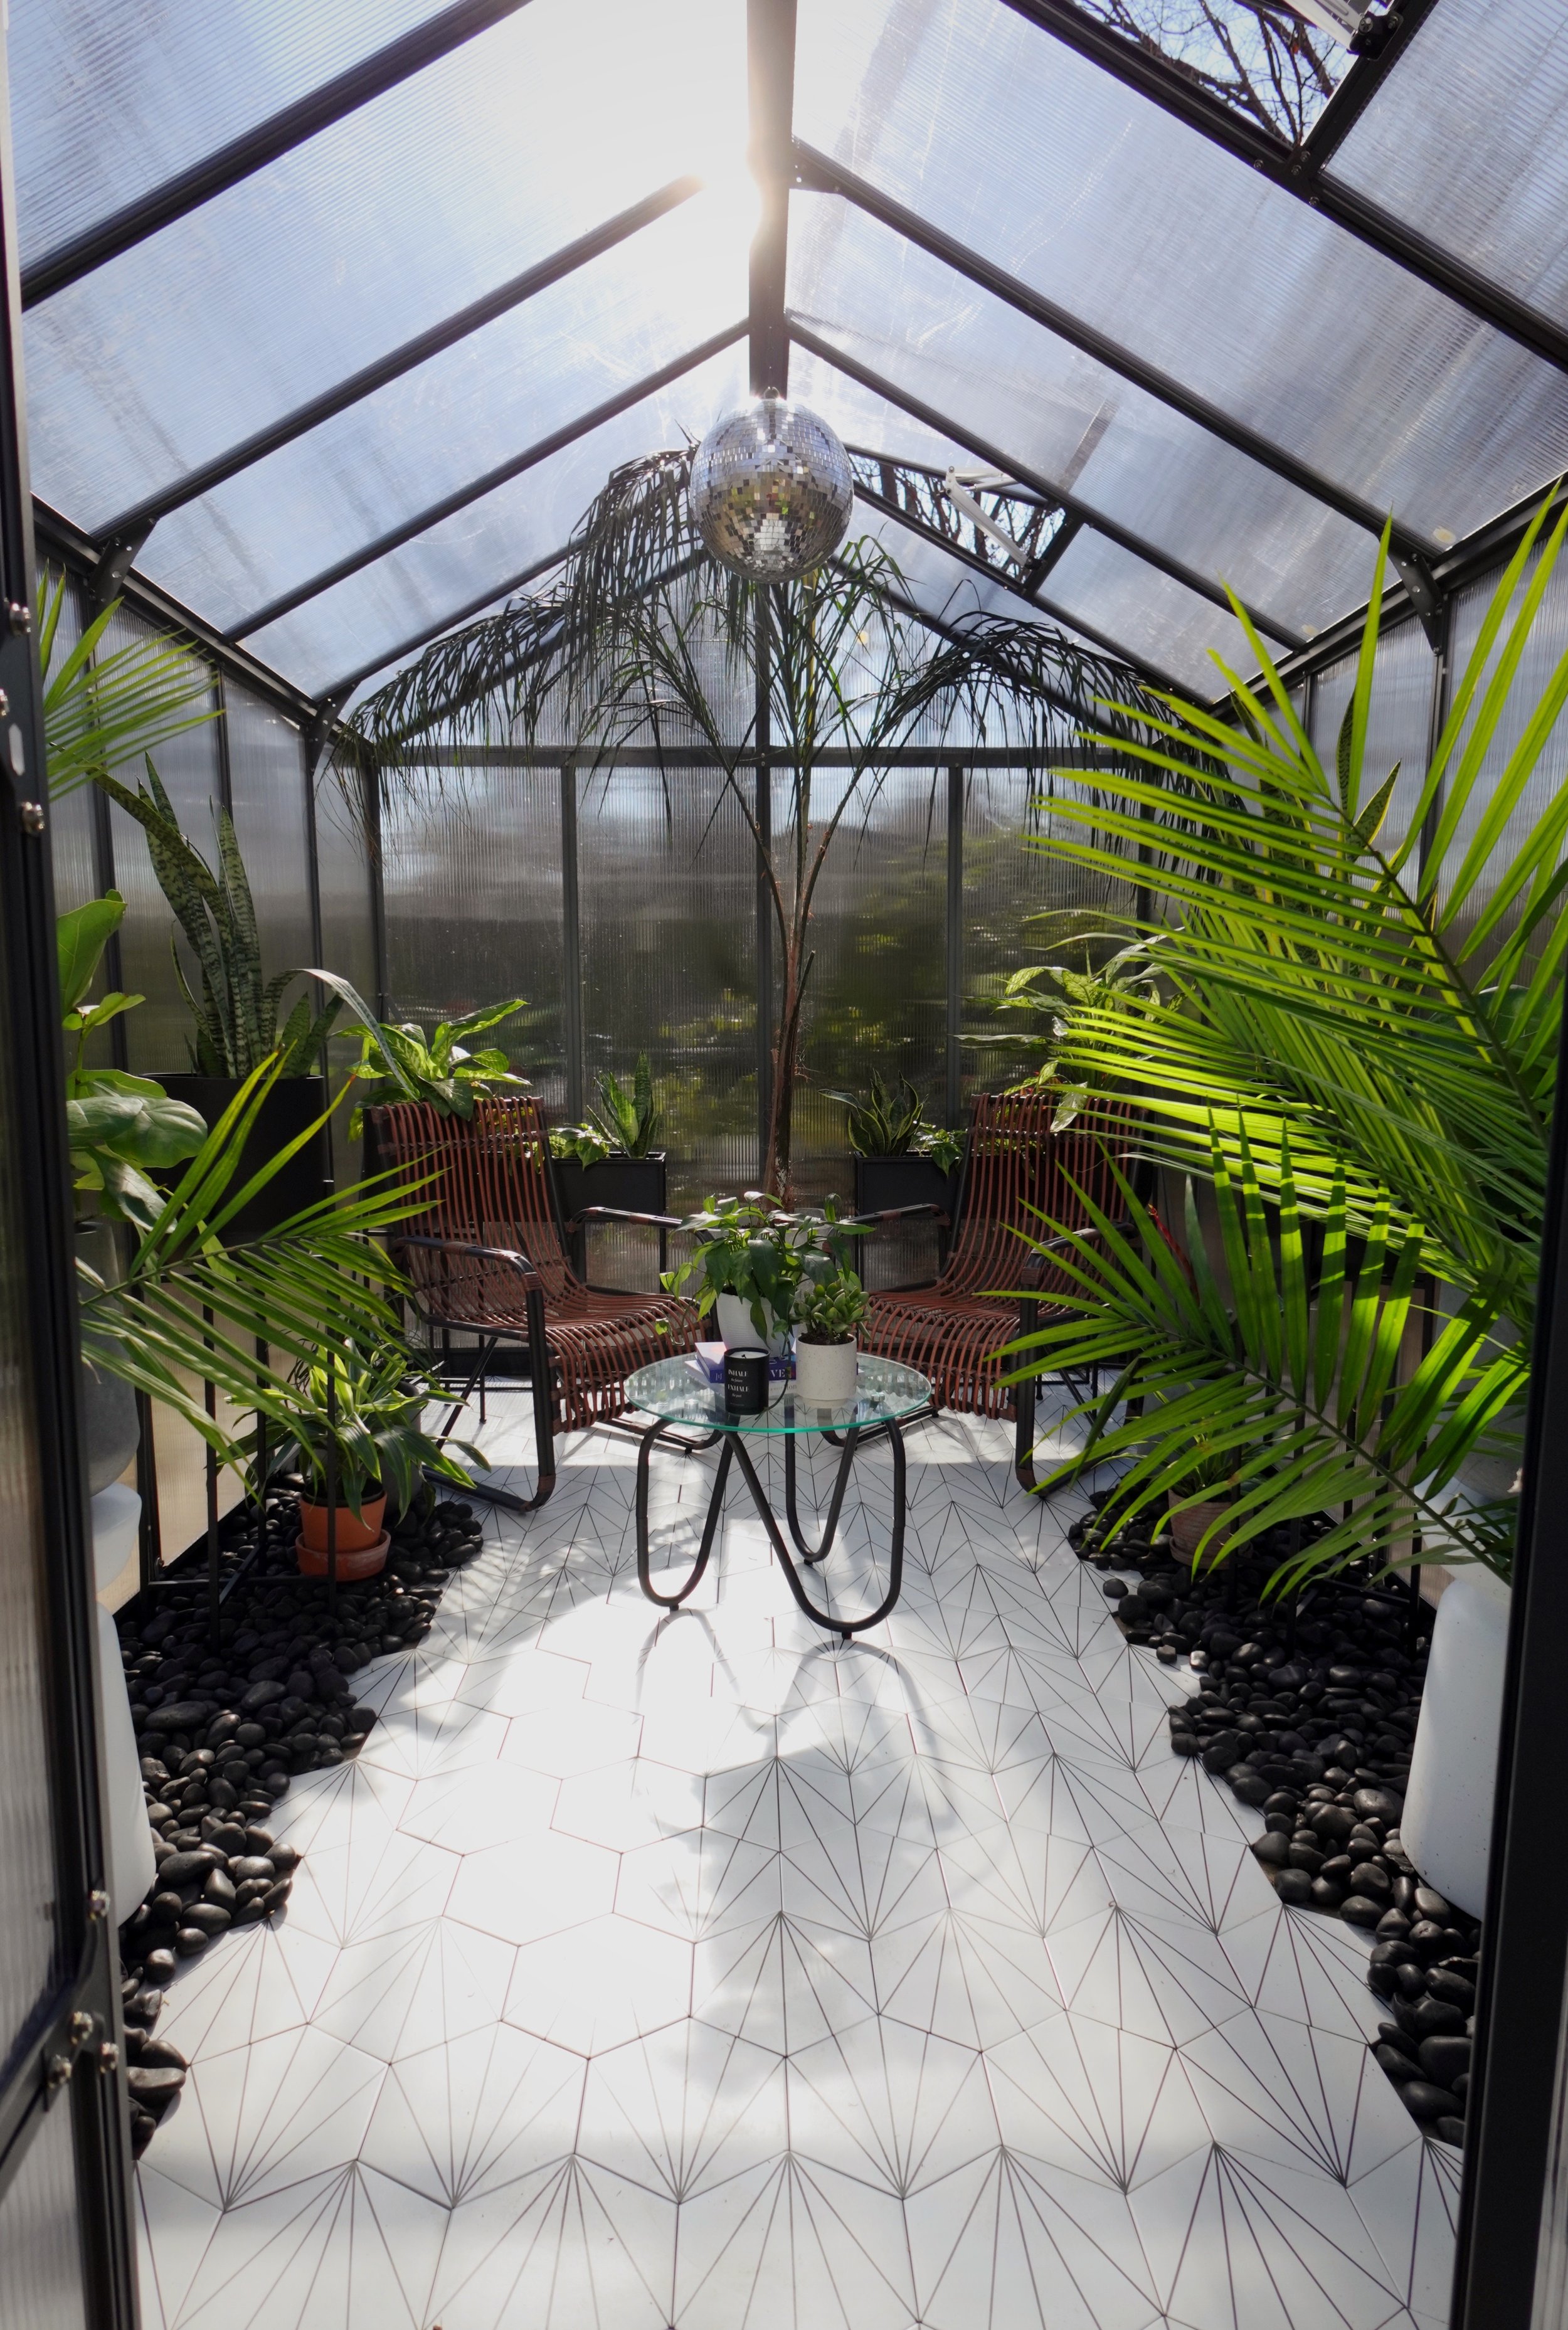
The Canopia by Palram Glory Greenhouse was the PERFECT size for my yard! And because of it’s high roof pitch, both I and my majesty palm - who’s taller than me, lol - could fit inside comfortably!
This particular greenhouse cost, $3,950.10, but is on sale now for $3,773.16.
And since I needed a little help with the assembly . . . ok, a lot of help, I called in the reinforcements and friends at The Pros Conctracting. For a job like this, I would say it’s safe to budget $800 - $1,000.
Interior Flooring
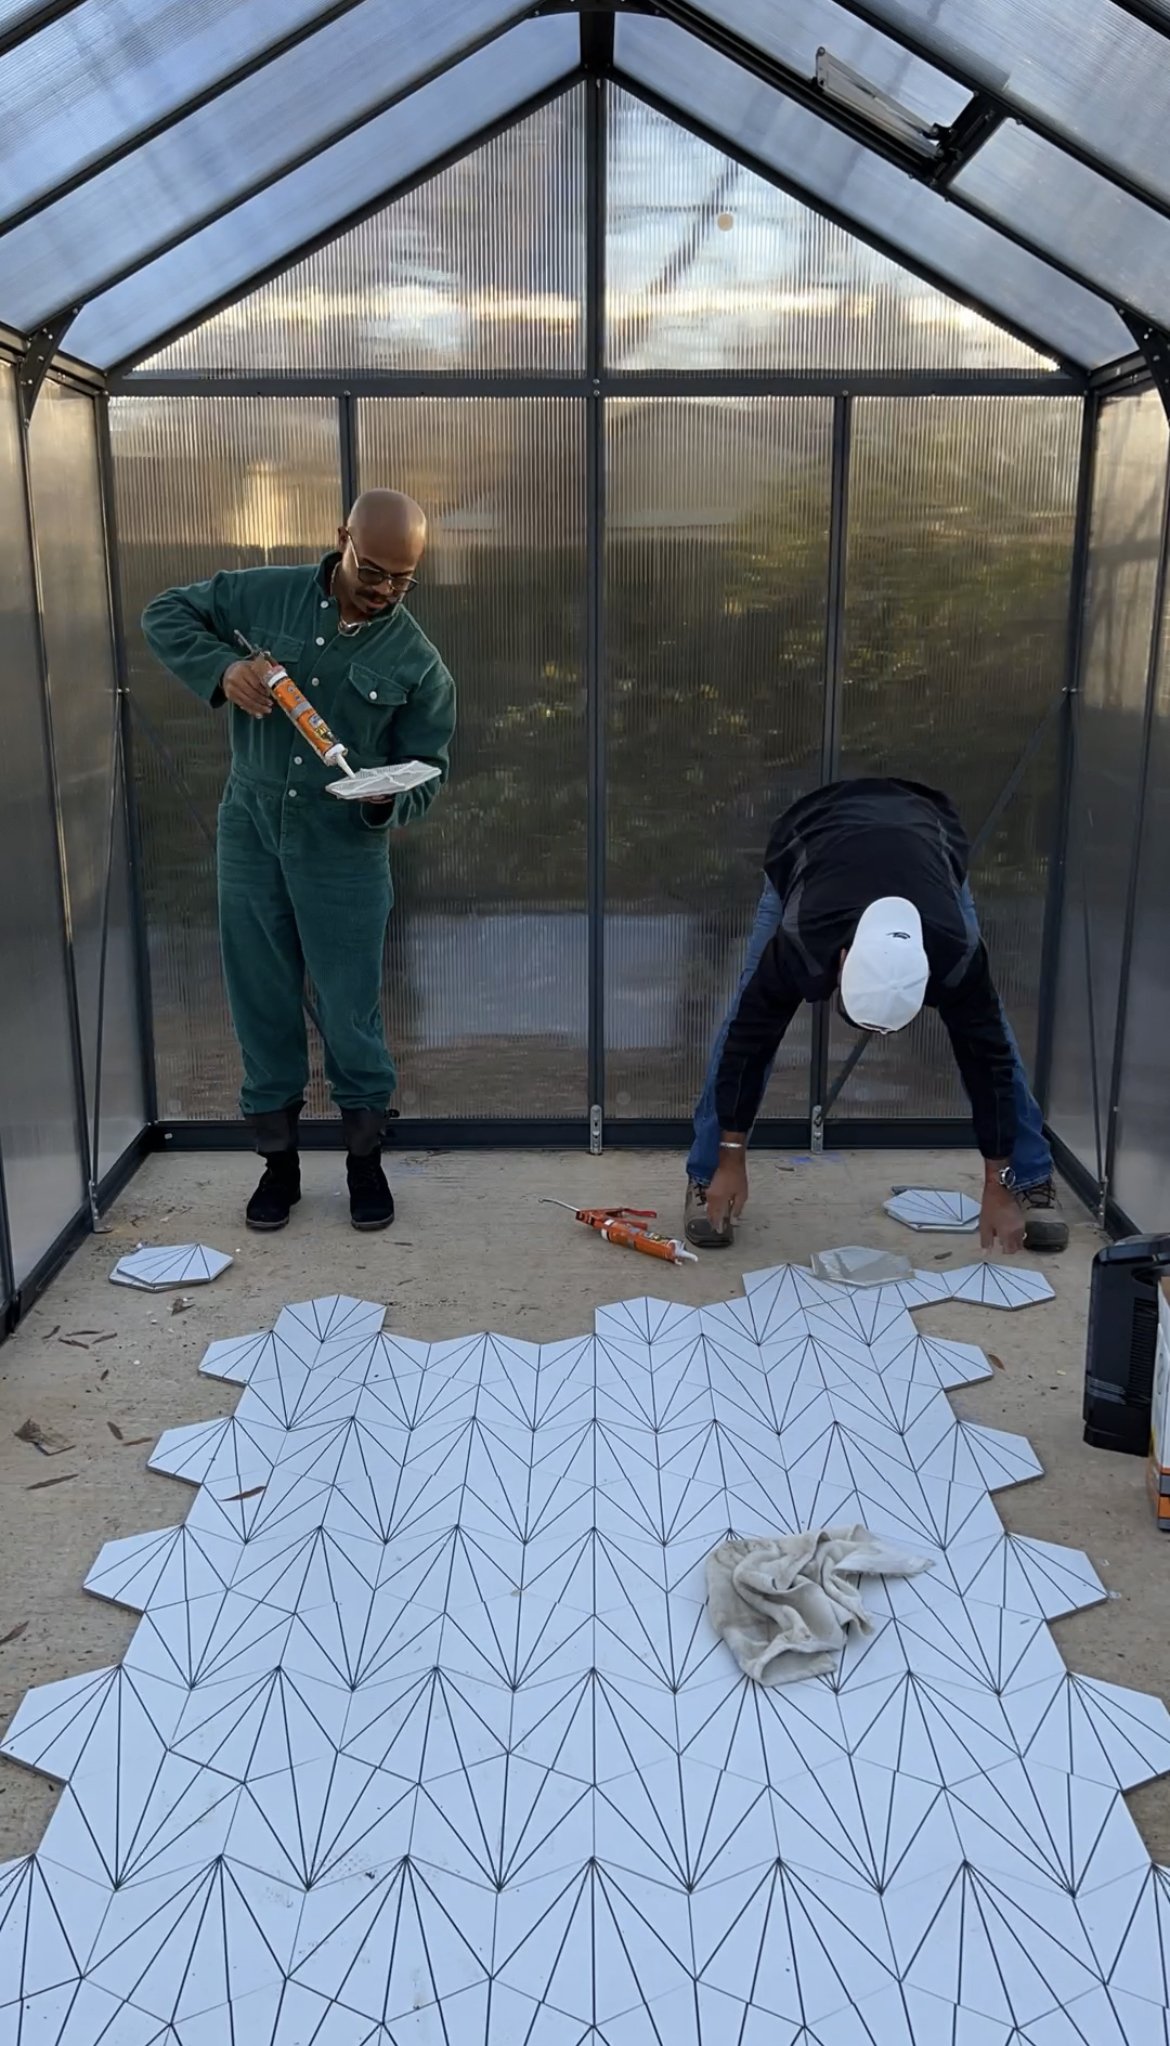
Initially, I thought about leaving the bare concrete floors. To facilitate the cleanup process of repotting plants, or bringing them in and out of the greenhouse, I thought that would be the best option. But since this space would serve as a care center for both me and my plants, I wanted to put a little more intention and pizazz into the design! For that, I decided to tile the interior floors with the Affinity Tile Aster Hex in blanco! Y’all, what better way to start off the design of this space than with a nod to my favorite design period, mid-century modern!
And y’all see who came to help make sure the tile was done right? DAD!
This particular tile is safe for interior and exterior spaces. And after seeing that it can also be purposed for shower floors, I thought it would be the perfect option for when water spills occur while watering my plants.
For the interior square footage of my greenhouse, I ordered 9 boxes of the tile. This brought the tile’s total to $1,670.13. In reality, I only needed 7 boxes. And since I’d only planned to tile enough area for two to four people to comfortably function without interruption, leaving a border of rocks to allow for overrun water from my plants, I surrounded the tile with these BEAUTIFUL jet black river rocks!

Due to time - because although my dream project, I had campaign deadline to keep in mind - I decided that using a heavy-duty construction adhesive would be an effective and timesaving installation method for the tile.
The total for flooring materials comes to:
9 boxes of tile: $1,670.13
12 bags of river rocks: $170.94
Case of construction adhesive: $157.75
Total (inclusive of taxes): $1,998.82
Last but not least . . .
Furnishings - You Know We Had to Create a Vibe!

While curating various outdoor spaces at my home, a big challenge has been finding outdoor furniture that is durable, cost-effective, and GORGEOUS! Y’all know some of that furniture can look all boxy and awkward!
Thankfully, on Lowe’s online store, I found this 3-Piece Patio Set that checked all my boxes! And because of it’s steel base and rattan roping, it will not only stand up to the elements, it lends itself to the bohemian, mid-century modern vibe I was going for! And the best part, it was only $484!
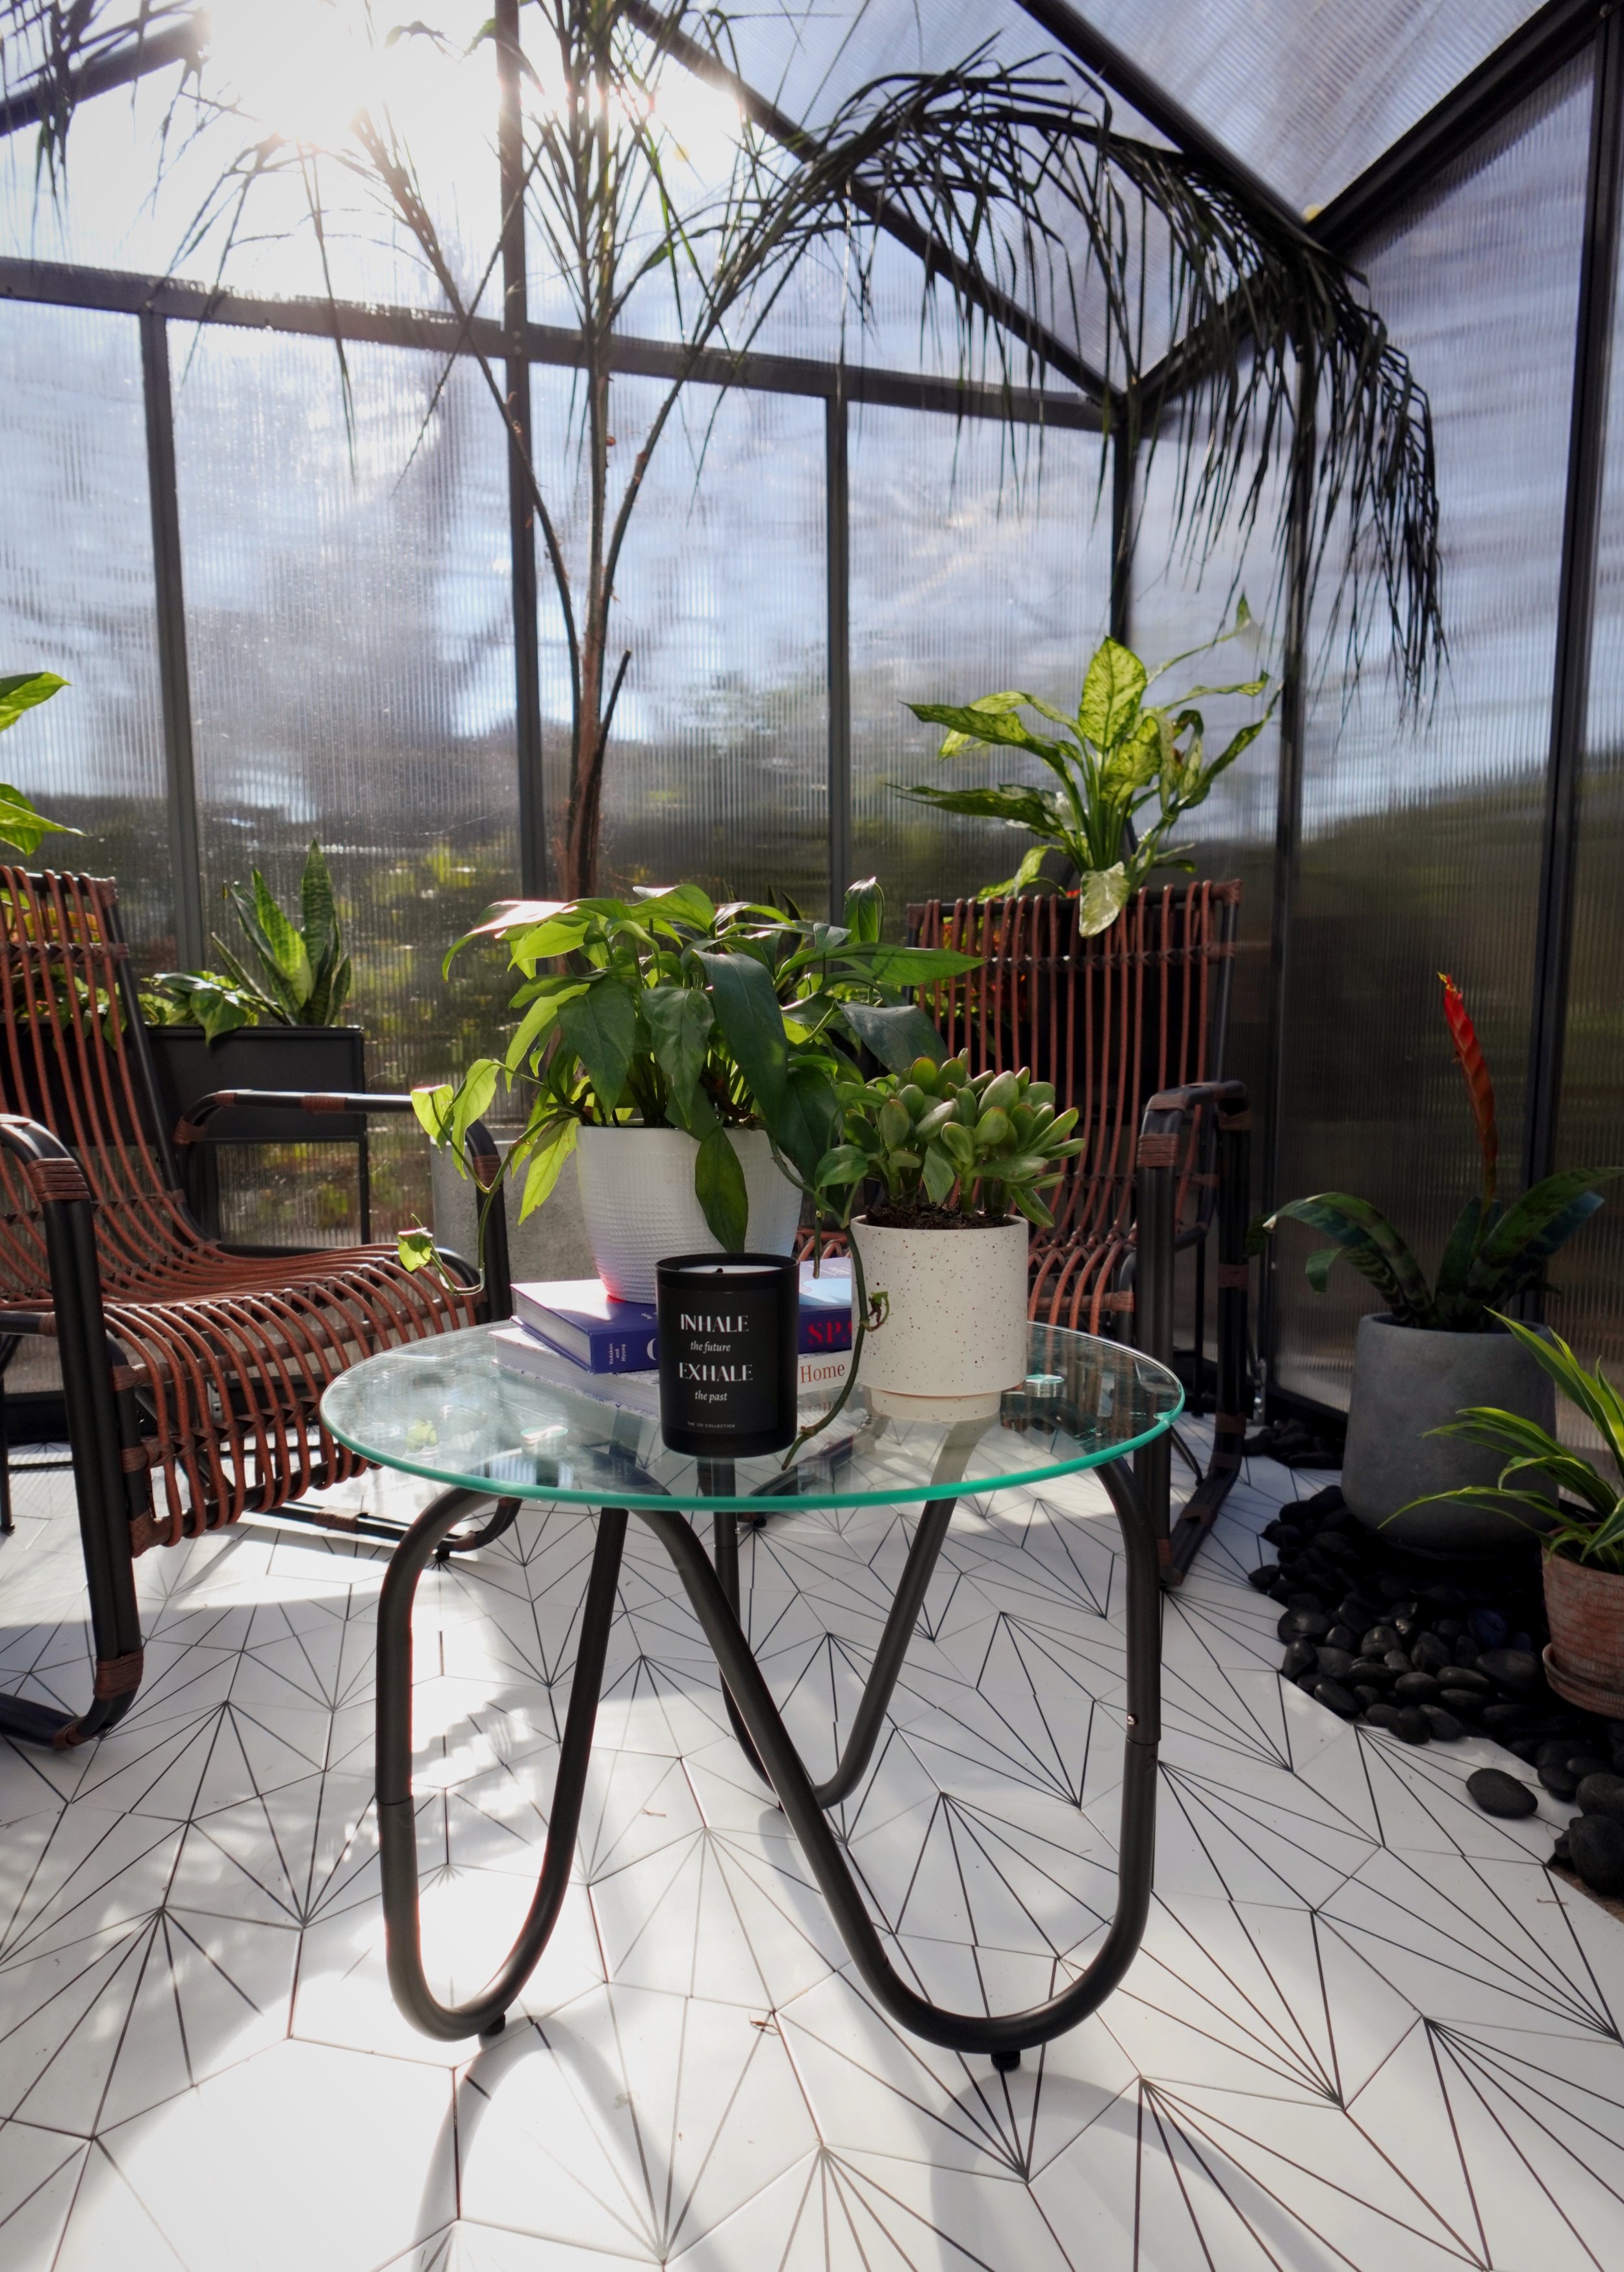
For additional planters, potting soil, plant stands, and other decor the total came to 1,100. Y’all I had A LOT of plants to get “rehoused” and ready for the winter. And because sharing is caring, how about a list of the accessories and additional furnishings I used to complete the look of Greenhouse IV?

So, for the entire project, the grand total came to . . . drumroll please 🥁 . . . $9,908.26, with $2,318.99 of that being my personal out-of-pocket expense.

This project has been so special and for so many reasons! But, the top two are, this is something I’ve wanted since childhood, and more important, I got to complete this project with my dad!
Hopefully sharing the costs here will help you in planning your greenhouse build in the (near) future! Of course, the cost may vary depending upon the size you need and how you decide to furnish the interior.
With Greenhouse IV now complete, I’m one step closer to creating the home of my entire dreams! For a complete behind the scenes of the journey from beginning to end, check out my GreenHouse IV highlights on IG.
Now y’all, make sure to stay tuned as I’ve got two more makeovers with Lowe’s . . . and two more major renovations coming up . . . NEXT week! Are y’all ready? And if y’all are, can you help me get ready?😅
Let me know your thought’s and questions below in the comment section!
P.S. to see the reel, featuring my padre, tap here!

