DIY Geometric Mural: Sunrise Wall
After a year of tackling our home projects, it seems as though we’re all ready to take things up a notch and really get creative with our spaces. And one way to add a simple yet impactful refresh to your home office, bedroom, or home gym even is by painting a geometric mural. The task may seem daunting at first. I know that was the case with me. However, I’m going to outline step-by-step how I turned this into an easy and fun update!
What You’ll Need
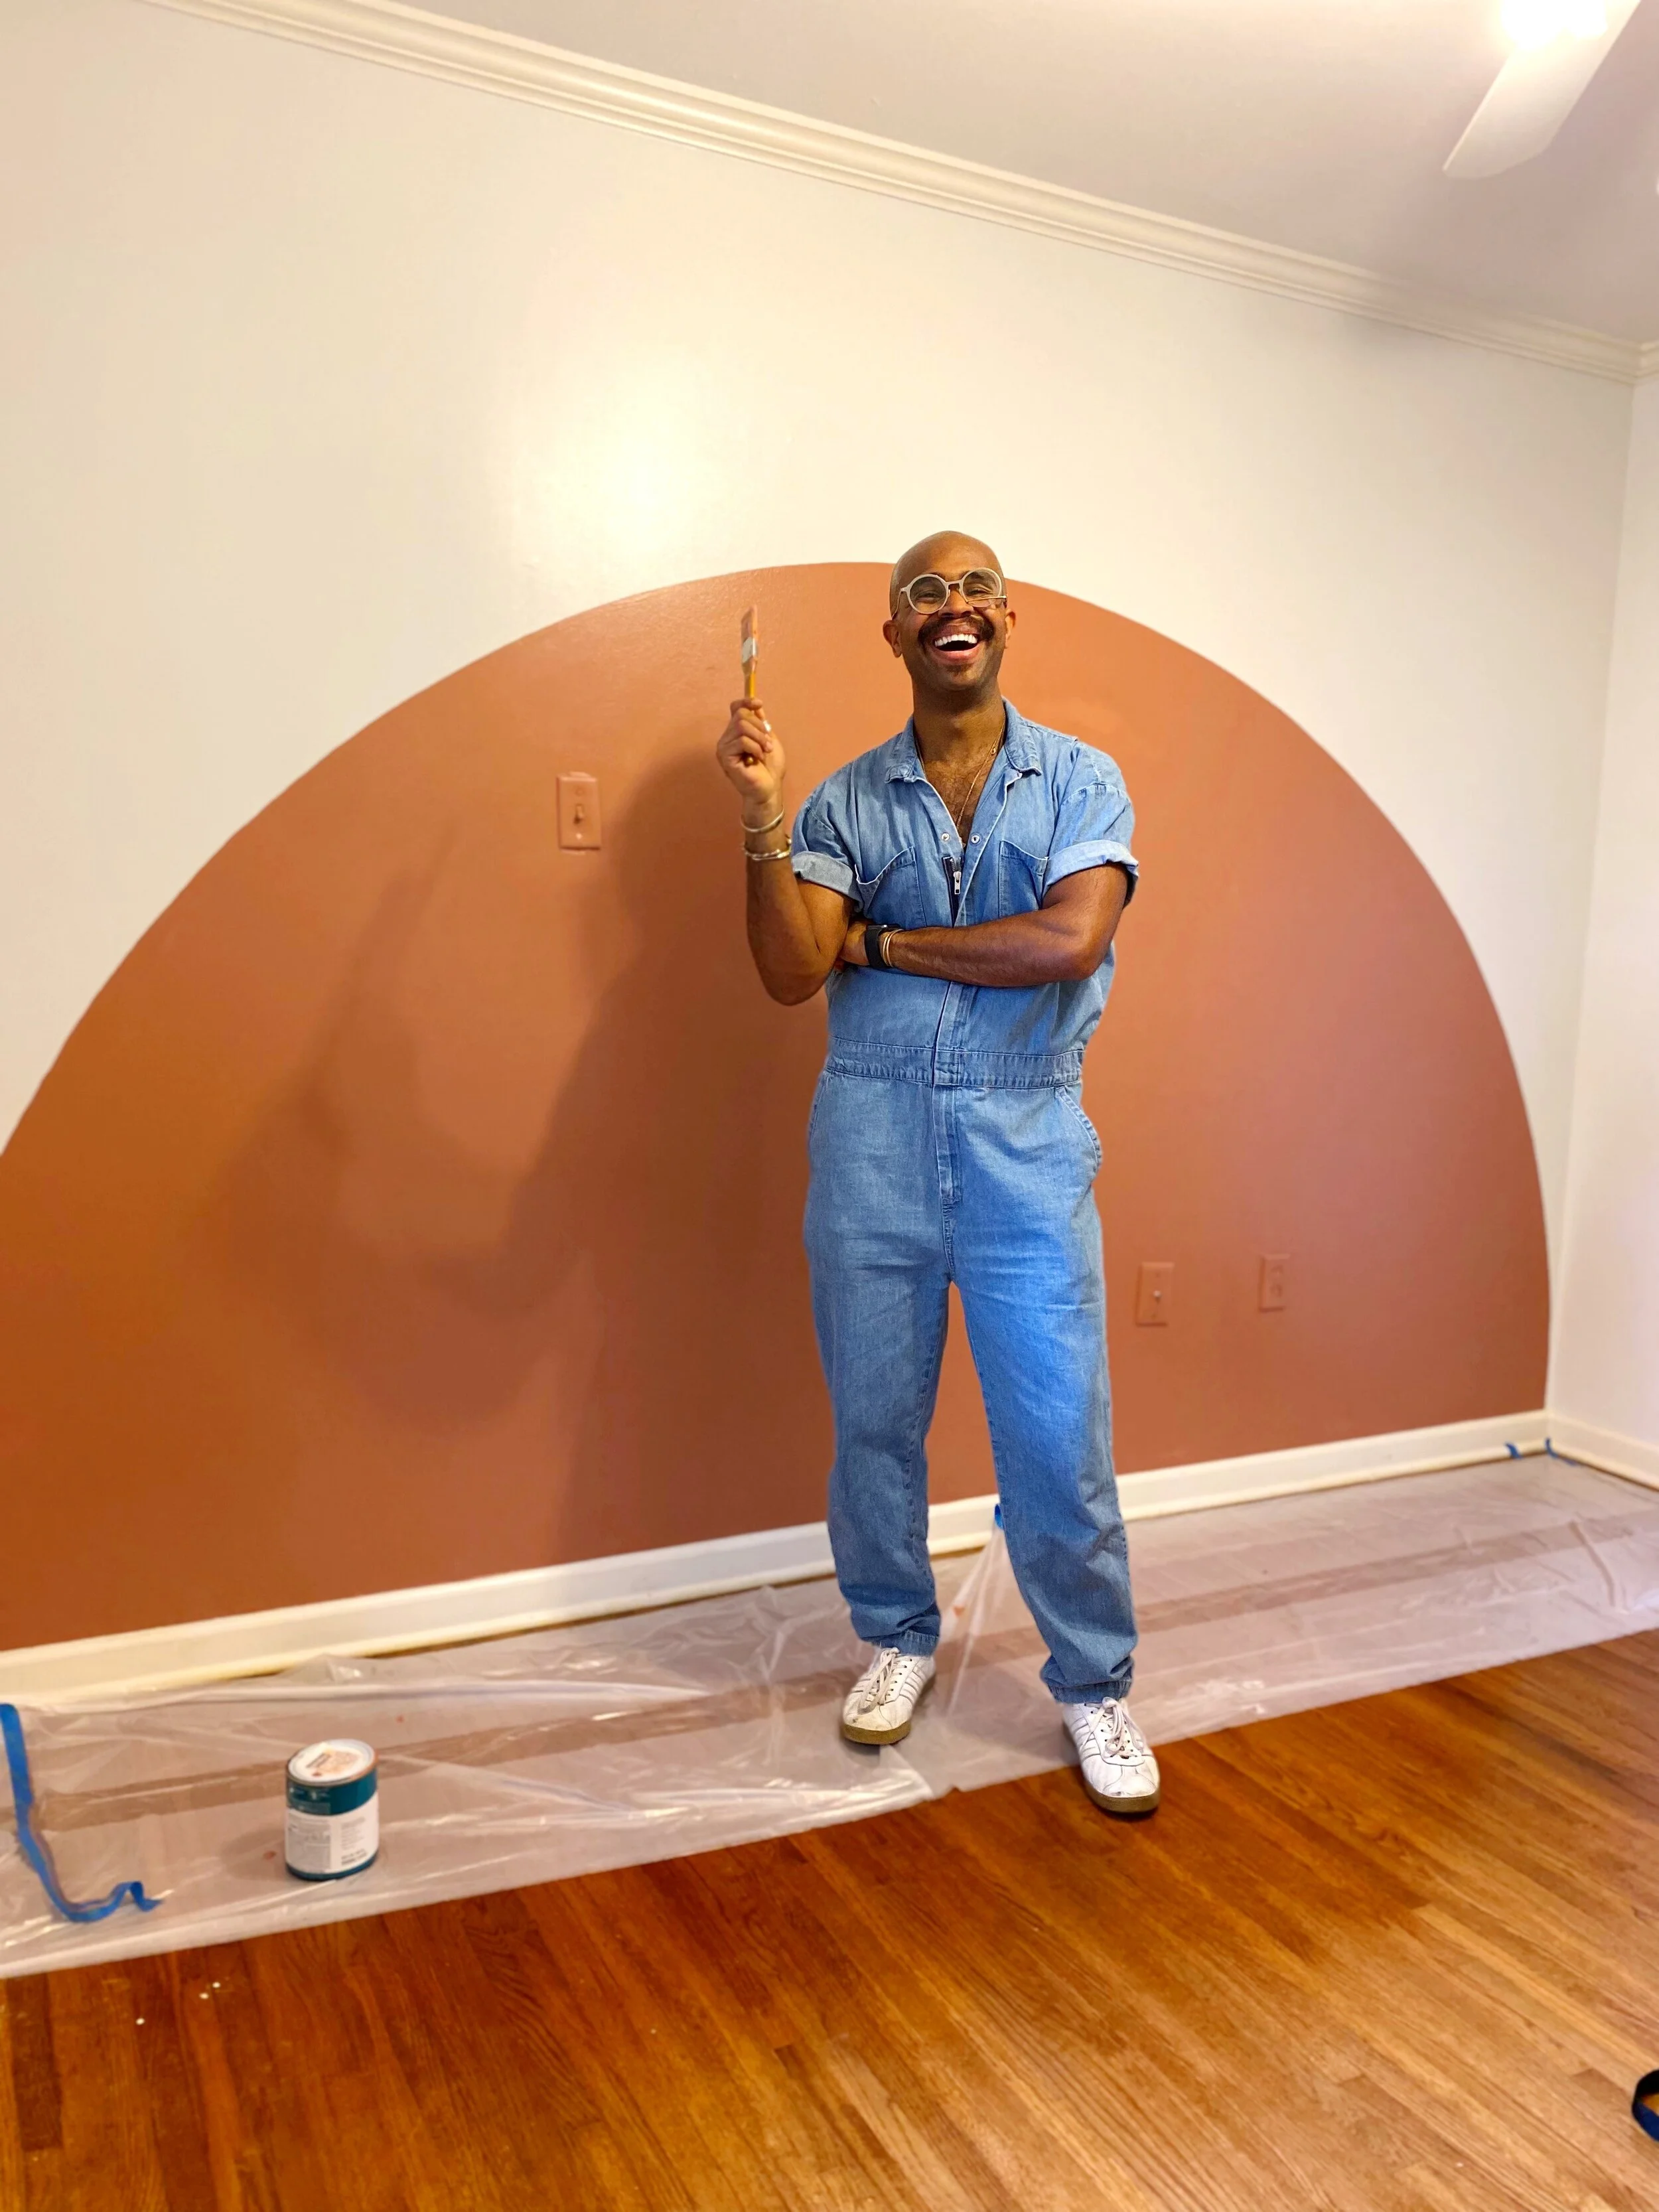
Paint - a quart usually works for murals this size. And for this wall, I use Behr Auburn Glaze
Paintbrushes - I used a 1 1/4” brush for outlining, and a 2” brush to help fill the space.
Tape measurer
Mini-roller
A Spool of twine
Pencil
Clear tape - for securing the pencil to the twine
Painter’s tape - optional (for baseboards)
Hammer and nail (1)
Music - to make this project even more FUN!
The SIMPLE Process
Once you’ve decided which wall you want to paint, measure the complete width of the wall. Now that you have that measurement, locate the center of the wall, and at the top of the baseboard, hammer in your nail (this is where you’ll tie on your twine a little later).
For a half-circle, or “Sunrise” Wall, from the center of the wall measure the vertical height you desire for your sunrise. This will always be dependent on the size of the wall.
For reference: I worked with an 11ft wall. To cover as much area as possible, I measured out a 5’2” vertical rise for the sunrise. That way, I had enough space to complete the edges once drawing drawing out the semi-circle.
Now it’s time to measure out and secure your twine. You will cut the twine the vertical measurement of your sunrise, leaving 3-4” of excess to wrap around your pencil.
First, tie a couple of knots around the nail at the top of the baseboard. And on the other end of, wrap your twine around the pencil, keeping in mind your half-circle’s measurement. Now, secure the twine to your pencil with the clear tape.
You’re ready to trace out your shape now!
Keeping the twine tight, start at one corner of your wall, then at your own pace, move about the wall to make it to the center. You’re now halfway there!!! Keeping the tightness of the twine, complete the other half, meeting the opposite end of your wall.
And now the real fun begins! With your desired paint color - and playlist set - fill in your sunrise, and you’ll now have mastered painting your very own geometric mural!
For reference, check out the video below:
If you’re ready to try this project out, let me know how it went in the comments below! I know you’ll do an amazing job!